I really wanted to JUST carry my iPad around at conferences. The problem was that I often needed a Windows O/S “machine” to complete task like code Python in VS Code or remote into my office computer.
So, what to do. The solution was simple I thought … use an Azure Virtual Machine and the Remote Desktop (RDP) app from Microsoft on my iPad. However, that was not an ideal solution as you really need a mouse to work well on Windows and the iPad does not support a mouse … or at least it USED to not support a mouse. Enter iPadOS 13! With iPadOS 13 you can now use a Bluetooth mouse (like the Surface Arc Mouse, the one I use!) with your iPad. Now I have a solution I can use.
Read this article from 9to5 Mac, How to use mouse with iPad, to learn how to setup your mouse with you iPad. Next, read the rest of this blog post to setup an Azure Virtual Machine (VM) and configure it for use with your iPad … or any other device that support RDP or just has a browser (we can use Azure Bastion to connect via a browser … but at a small cost[$] that we will discuss later).
This blog will show you how to setup and configure the following in Azure and on your iPad (or a PC, Mac or Android table) to compute anywhere using Azure:
- Azure Virtual Machine (VM) – the host you will use in Azure for computing (https://azure.microsoft.com/en-us/services/virtual-machines/)
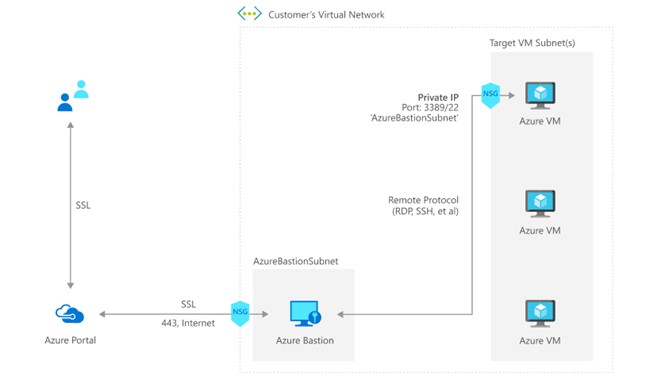
- Azure Bastion – a new service in Azure to connect to VMs using your browser and Azure Portal (https://azure.microsoft.com/en-us/services/azure-bastion/)
- Microsoft Remote Desktop (RDP) client on iPad – app to connect to Azure VM from iPad (https://apps.apple.com/us/app/microsoft-remote-desktop/id714464092)
Setup Azure Virtual Machine
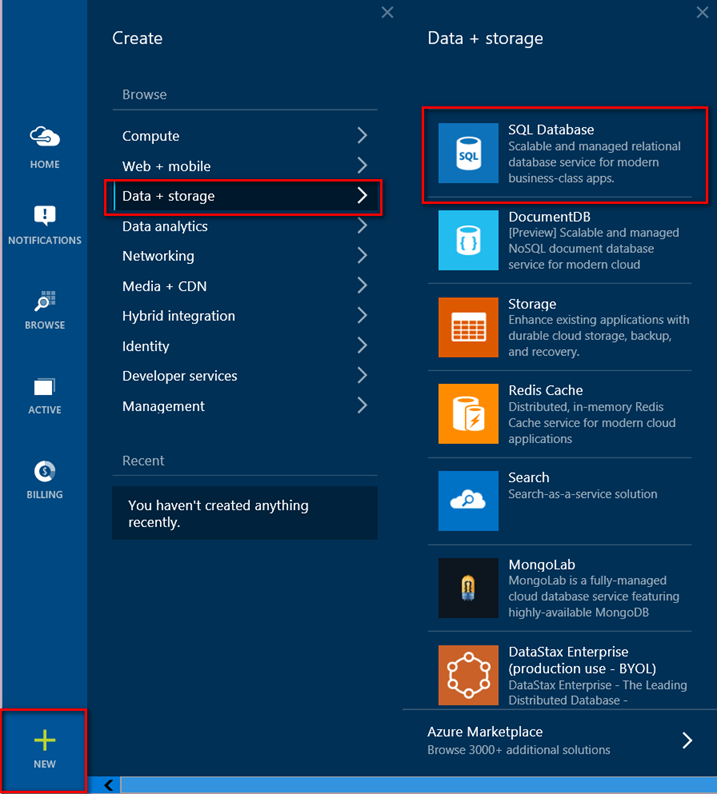
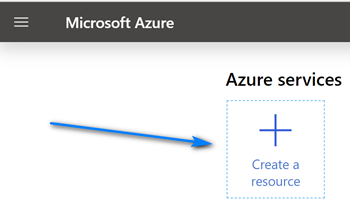
- Navigate to the Azure Portal (https://portal.azure.com) and click the “Create a resource” button at the top of the page.
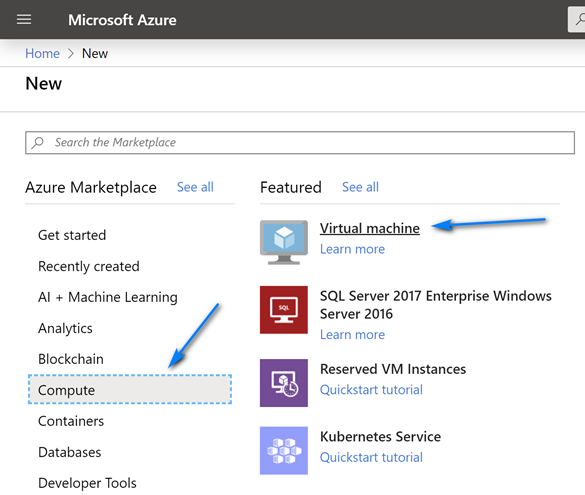
- In the Azure Marketplace click “Compute” then click “Virtual Machine” to begin the wizard to create a Virtual Machine.
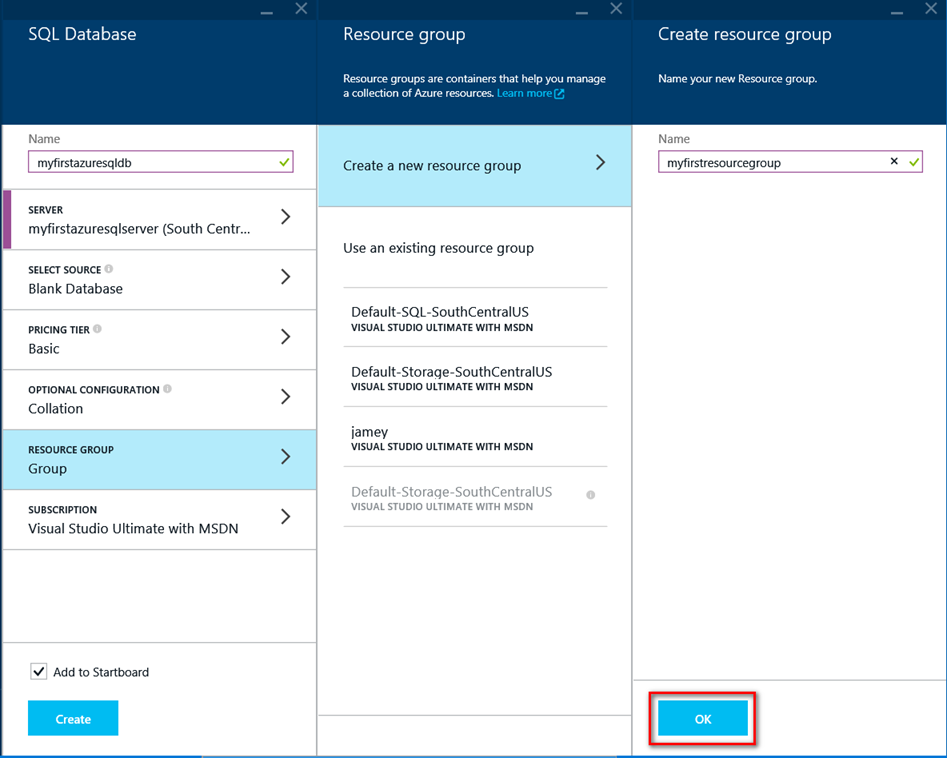
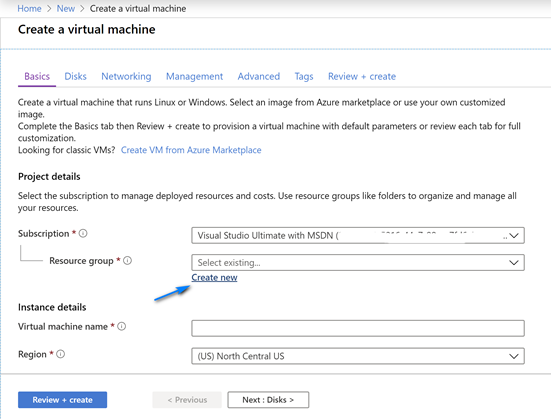
- In the Virtual Machine Wizard select the desired subscription you desire to create the VM and select the Resource Group to create the VM inside. If you don’t have a resource group already, click “Create new” under Resource Group to create a new Resource Group. Enter desired name in pop-up for Resource Group and click “OK”.

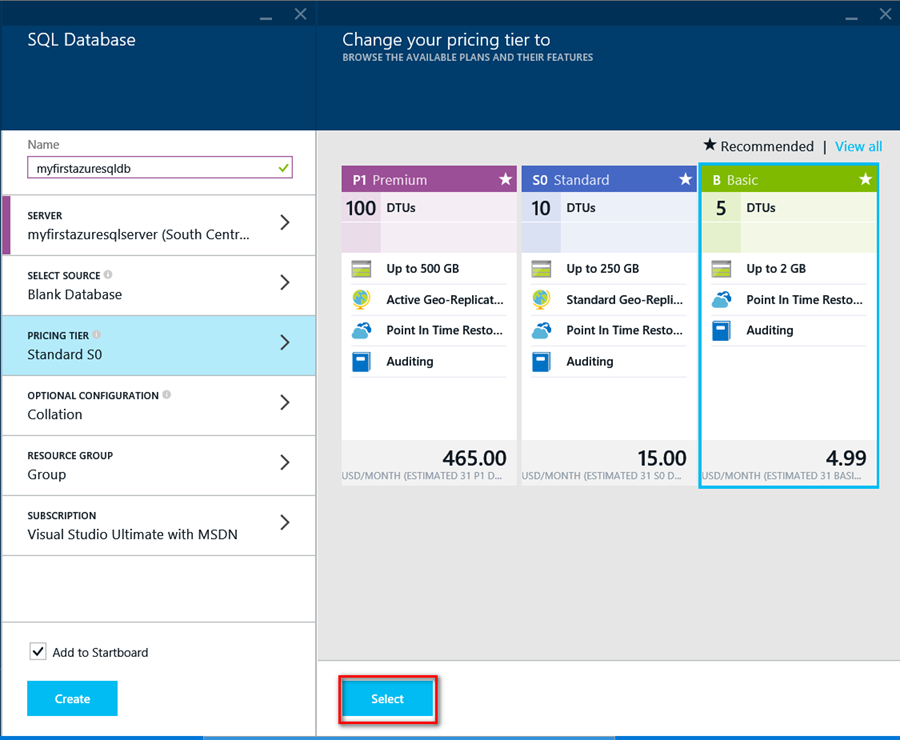
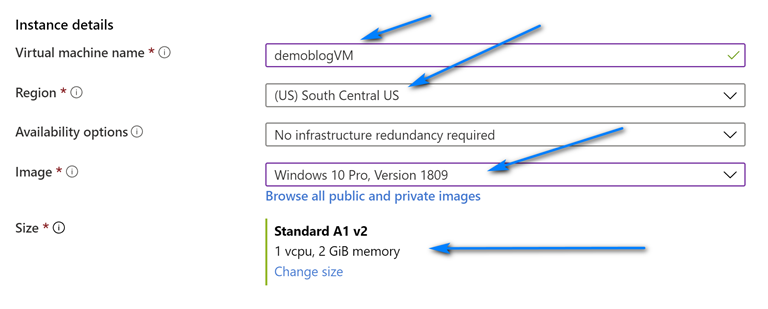
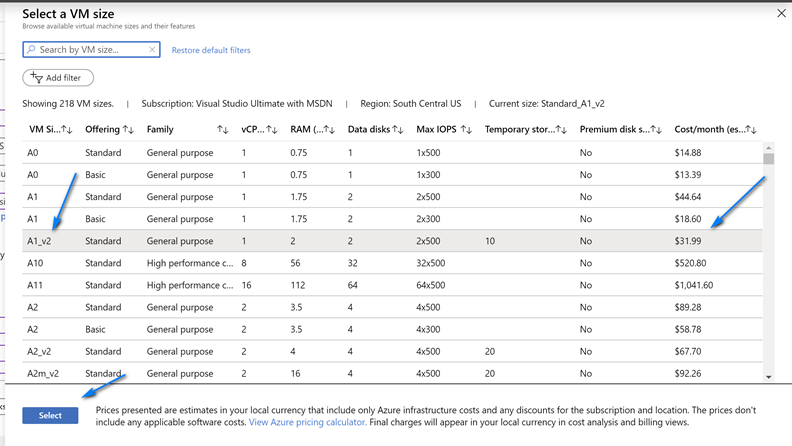
- Under Instance details enter your desired VM name, pick your region, your O/S (in my case just want the latest Windows 10 Pro build – 1809) and your VM size (click “Change size” to select size) for your VM. For demo purposes I will pick a small VM size. You should pick the appropriate VM size for your needs. Note you can shutdown and stop the VM when you are not using it to save cost. So, the monthly cost can be 1/3 less for example if you are only using it 8 hours a day and stopping the VM when not in use! The good news is you can change the size after you create the VM if you need a bigger size later on – Resize Virtual Machines.
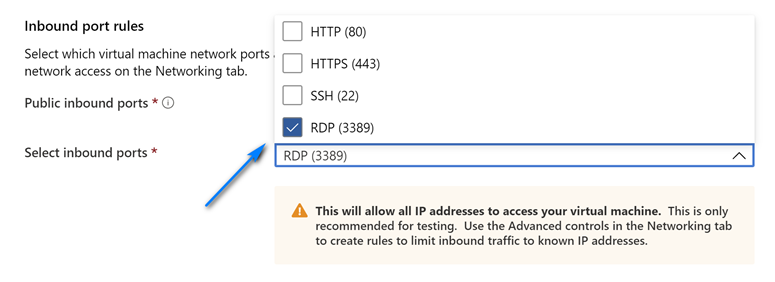
- Under Administrator account enter a username from the admin user and create a password. Under Inbound port rules select “Allow selected ports” and choose RDP (3389) to expose the RDP port to allow the iPad RDP client to connect.

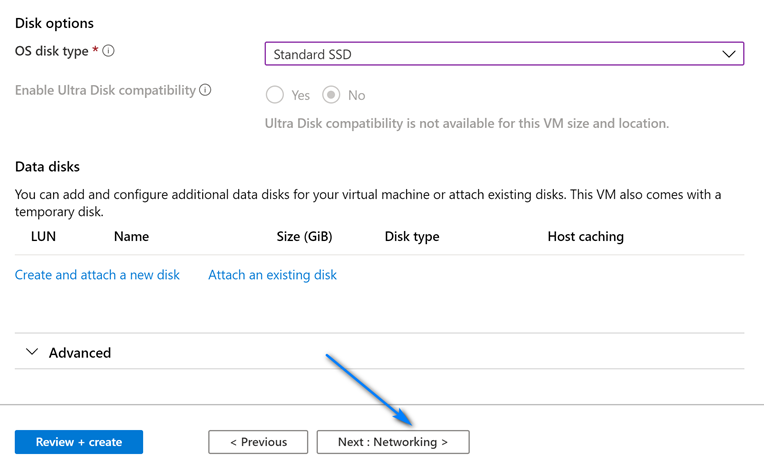
- Click “Next : Disks >” and leave the defaults on the Disk page and click “Next : Networking >”

- Configure the Virtual Network by leaving the default name and clicking “Create new”.
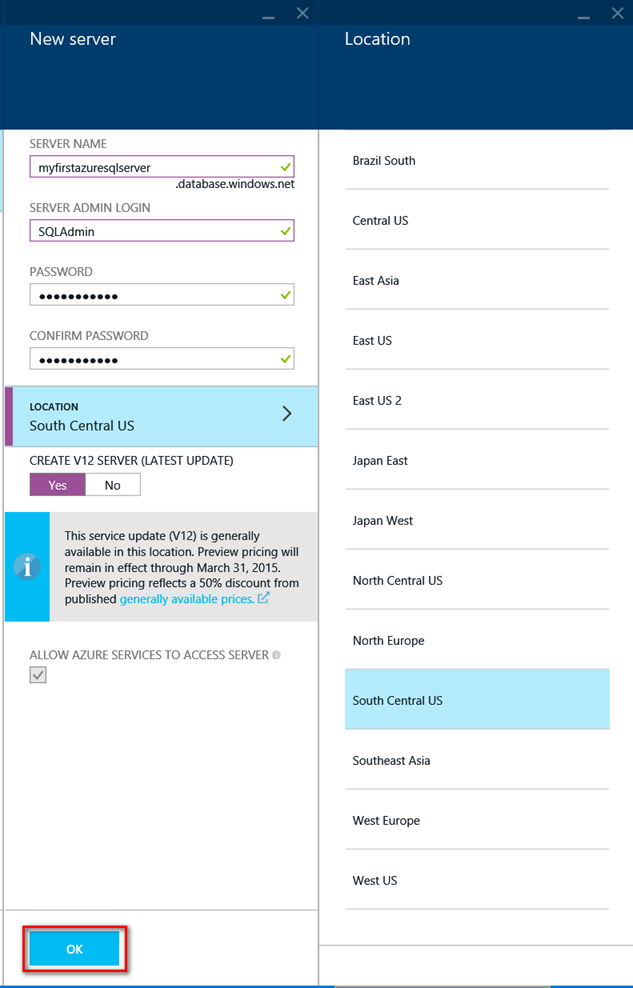
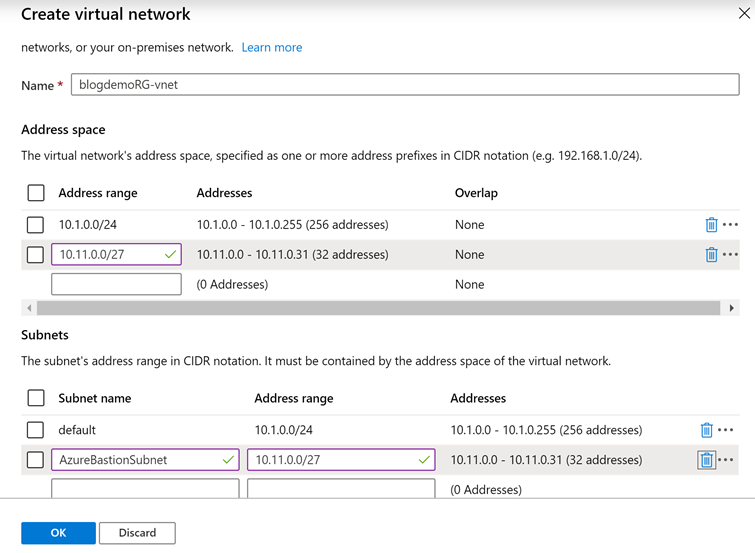
 On the Create virtual network screen leave the default name and fill out the information like below (you can choose you own ranges but make sure to have one with mask 24 for RDP/HTTP and one with mask 27 for Azure Bastion) for the Address spaces and Subnets. Note we create two address spaces and subnets. One is the default with mask 24 for use with RDP and the other is with mask 27 used for Azure Bastion. The name of the Azure Bastion subnet must be AzureBastionSubnet. Click “OK” when done filling out the addresses.
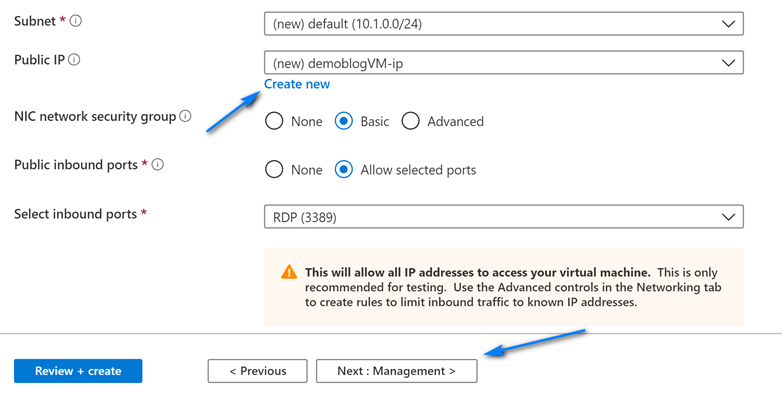
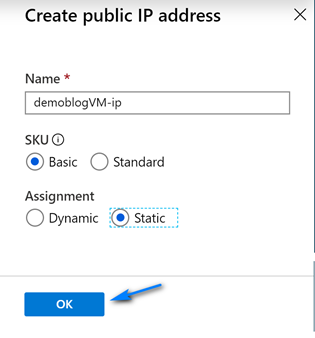
- You can leave the Subnet setting to the default. Click “Create new” under Public IP and select “Static” under Assignment (This will allow the IP address to stay the same so you can easily connect to it each time for RDP). Leave the RDP (3389) setting and click “Next : Management >”.
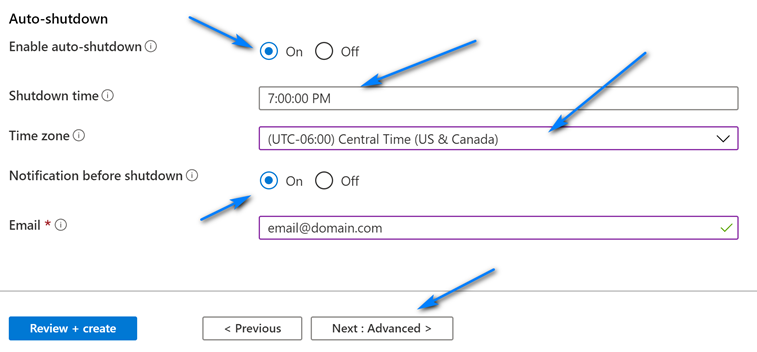
- At the bottom of the Management section you may want to configure Auto Shutdown to assist in saving money by having the VM shutdown each night at a specific time. You can configure it to email you before the VM shutdowns as well. Make the desired setting here and click “Next : Advanced >”.
- You can take the defaults on the Advanced and Tags pages and go Review + Create page. Review all your settings and make sure they are correct. Make sure you have the green
bar at top with “Validation passed” and click “Create” to create your VM.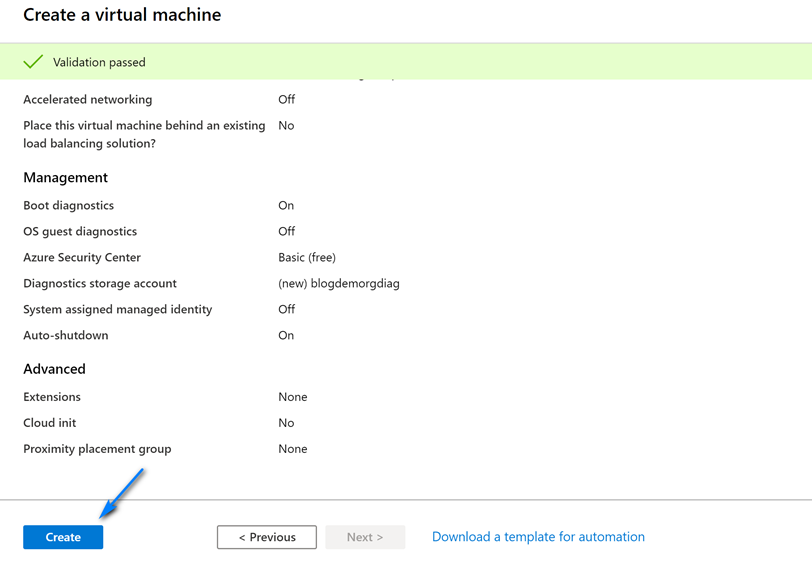
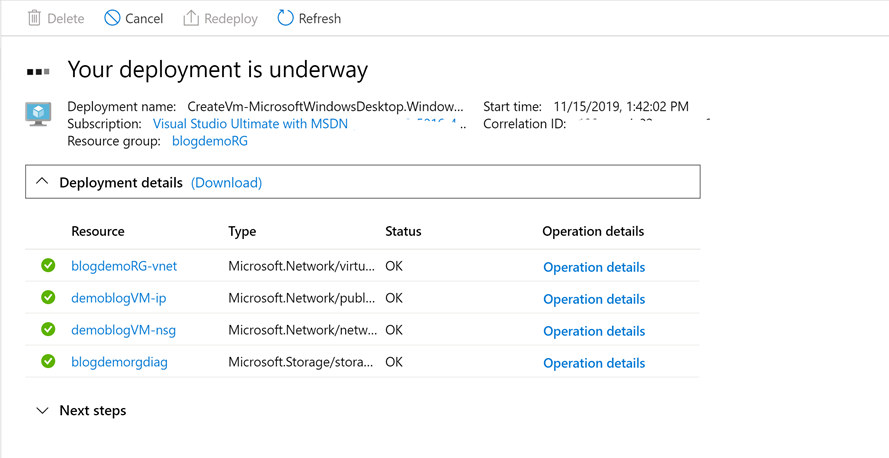
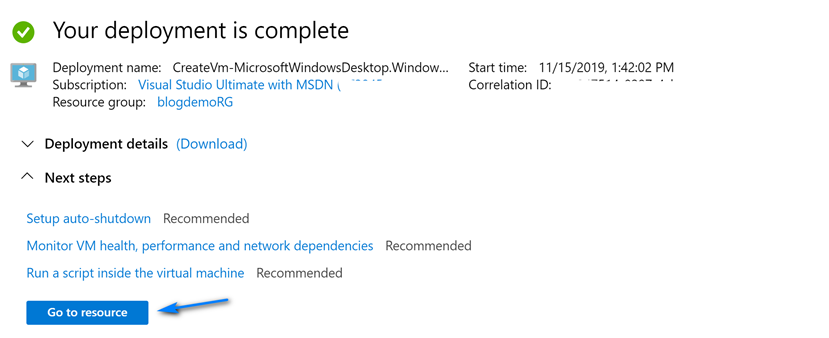
- The next screen will show the status of you VM deployment. Watch this screen until you get “Your deployment is complete”. Then click “Go to resource”.
- On the VM resource page click “Connect”.
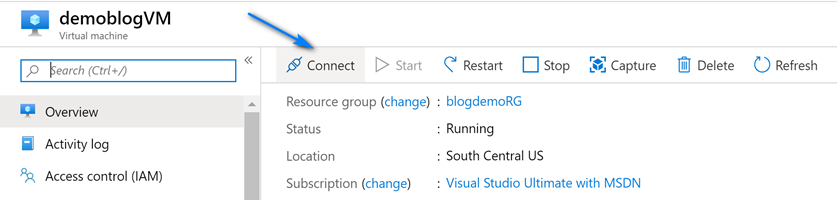
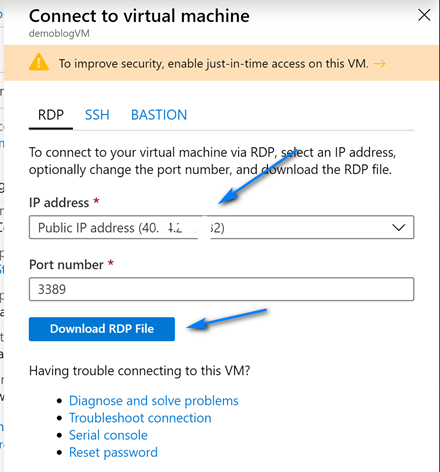
- On the RDP page you will find the Public IP of your VM and you can also click the “Download RDP File” to download an RDP file to connect from your PC. You will want to jot down the Public IP address (I have masked mine slightly for security in the blog post) for use on your iPad or other devices which support RDP.
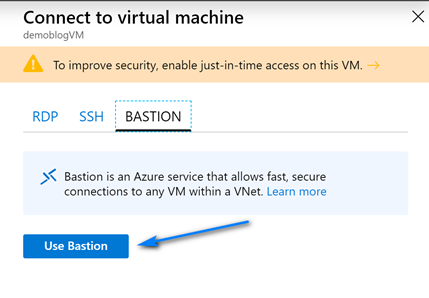
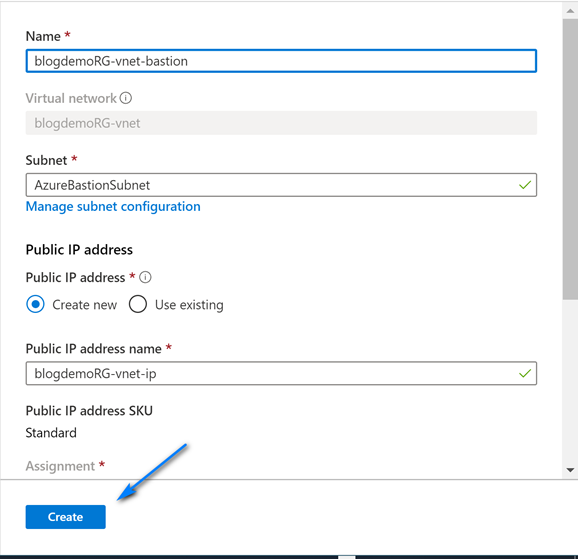
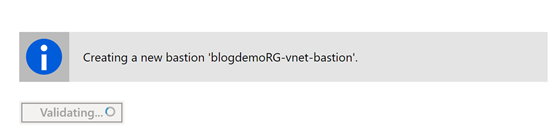
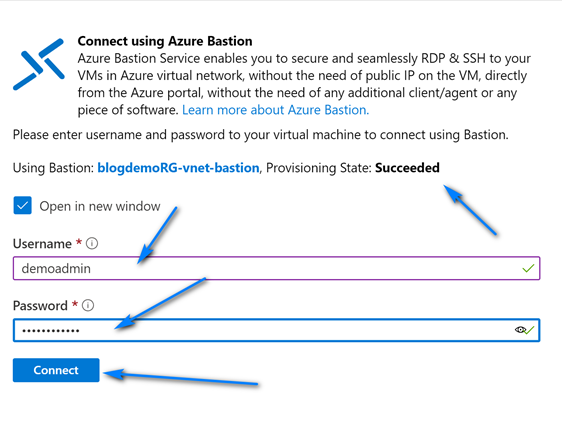
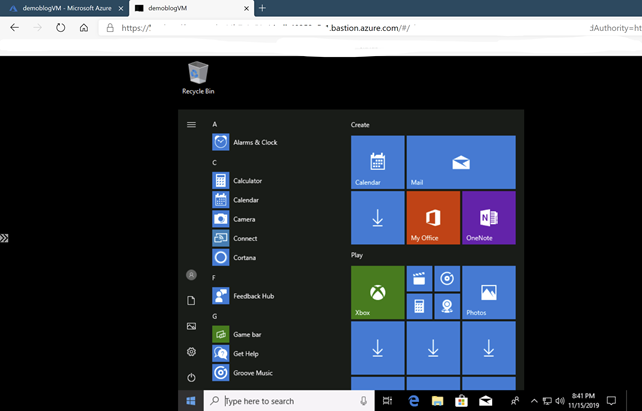
- To use Azure Bastion which enables connectivity from a browser, click the Bastion at the top and then click “Use Bastion”. On the next screen you can leave the default settings as we already configured the AzureBastionSubnet in the VM setup and click “Create”. You will get a “Creating a new bastion <name>.” message. Wait until you get the “Provisioning State: Succeeded” message with the login and then login and test Bastion.NOTE: Azure Bastion at the time of this blog post is about $140/month plus network charges (first 5GB is free). I just use RDP personally, but I wanted to demonstrate how to setup Azure Bastion as it is a great service for organizations that want a more secure connection that utilizes just a browser and https. Azure Bastion pricing.
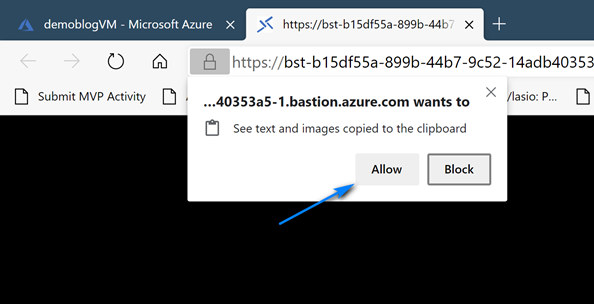
- When Azure Bastion connects you will see a pop-up to allow to send text and images to the clipboard when you connect. Click “Allow” to enable the clipboard for your VM (Cut/Copy/Paste).
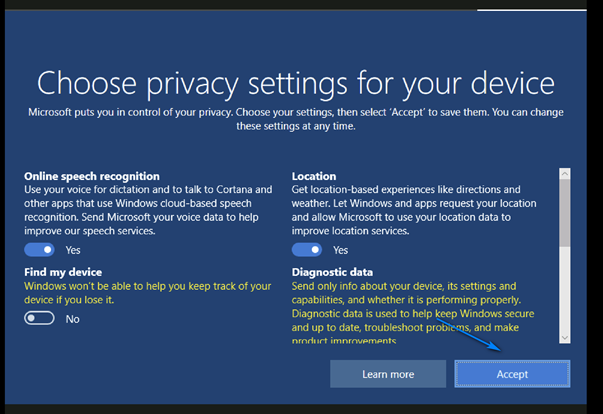
- You are now connected to your new Azure VM! On the privacy screens you can take the defaults (or change if you like) and click “Accept”.
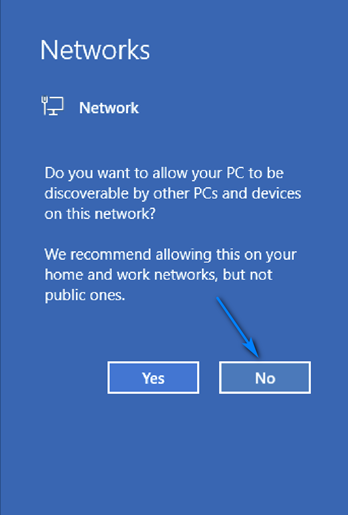
- After that it will prompt to see if you want your machine discoverable on the network. I picked “No” as I just have the one VM.
- And you are in you VM. Install the software you want to use – VS Code, Miniconda, Docker, … Whatever you like! You have a Windows 10 Pro PC in the cloud!
Configure RDP on iPad
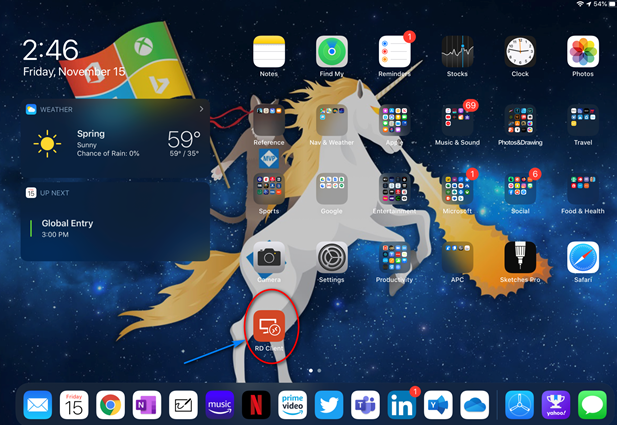
- Install the Microsoft Remote Desktop (RDP) client on your iPad to connect to Azure VM from iPad. Launch the RDP Client, “RD Client”, to start the Microsoft Remote Desktop client.
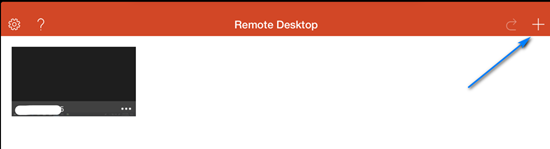
- When launched click the “+” at the top right to start a new RDP connection to your Azure VM.
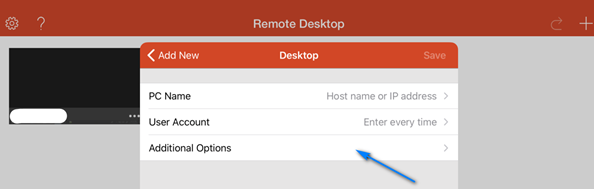
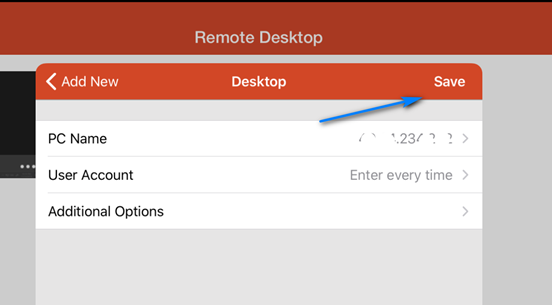
- Select “Desktop” on the “Add New” screen that pops up.

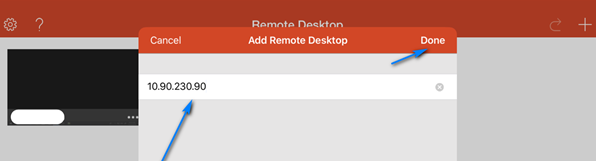
- In the “Desktop” screen select the “PC Name” section to enter the IP for your Azure VM. In the “Add Remote Desktop” screen the pops up enter the Public IP address for your Azure VM and click “Done”. (See Step 13 above in the Setup Azure Virtual Machine section).

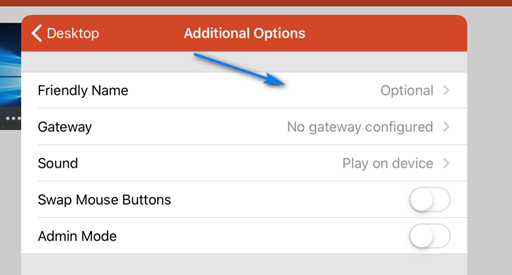
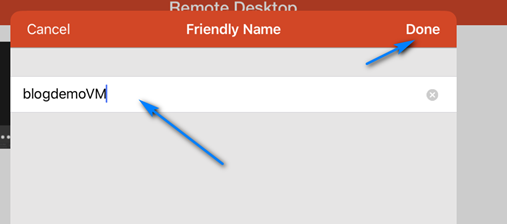
- Click the “Additional Options” entry box and click “Friendly Name” in the “Additional Options” screen to enter the name of your VM. Enter a friendly name from your VM and click “Done”.
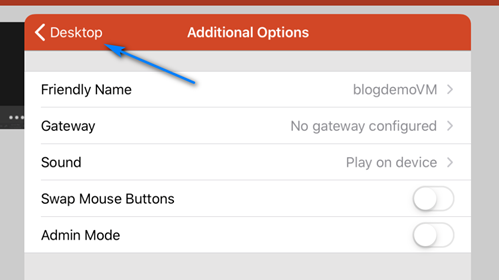
- Click “Desktop” on the next screen and then click “Save” to save the RDP connection in the RD Client.
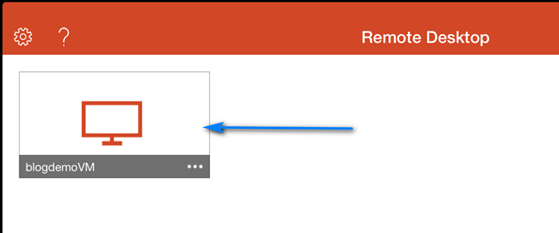
- In the main window of the Remote Desktop client click the new connection you made to connect to your Azure VM.
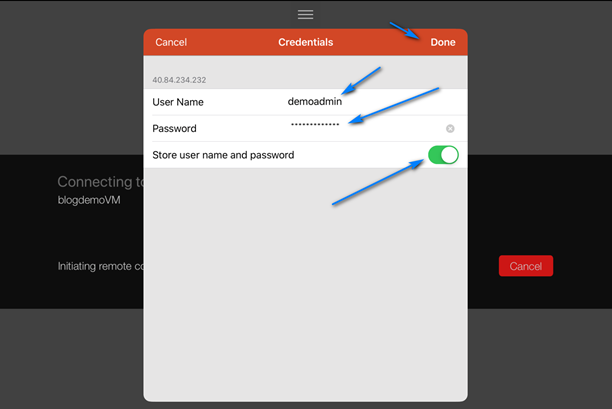
- Enter the username and password for you Azure VM and optionally select the “Store username and password” option and then click “Done”.
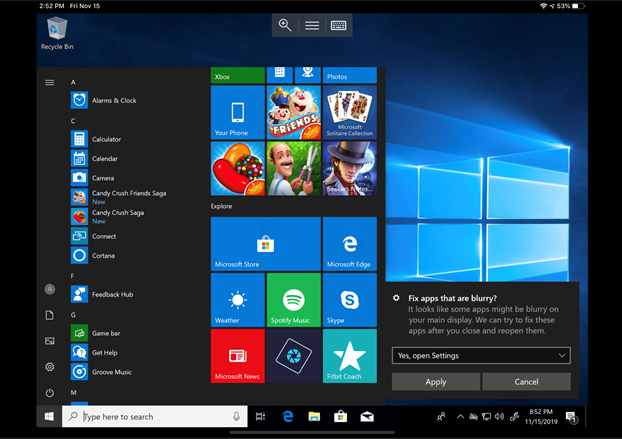
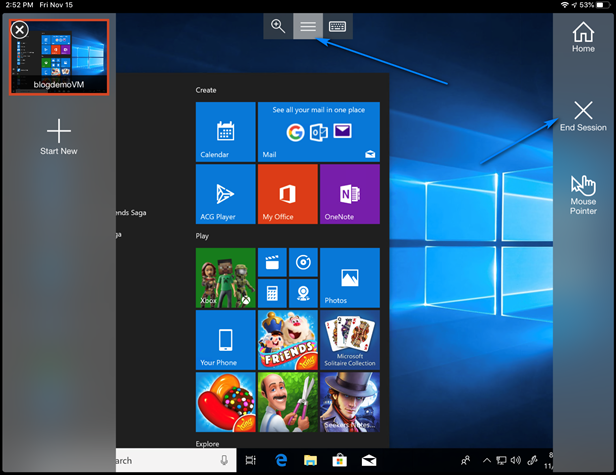
- You should successfully be connected to your Azure VM if you entered everything correctly!!! If you want to use your mouse make sure you configured your iPad for the mouse using instructions from 9to5 Mac, How to use mouse with iPad.When you are ready to end your RDP session you click the button in the top middle with the three bars and then click “End Session”. To save money be sure to “Stop” your VM if not using it. If you configured the auto shutdown when you configured your VM it should automatically shutdown at the time you specified each day if it is up and running at that time.
Stop Azure VM when Not in Use to SAVE MONEY!
In the Azure Portal click the “Stop” button at the top to “Stop” the Azure VM when not in use.
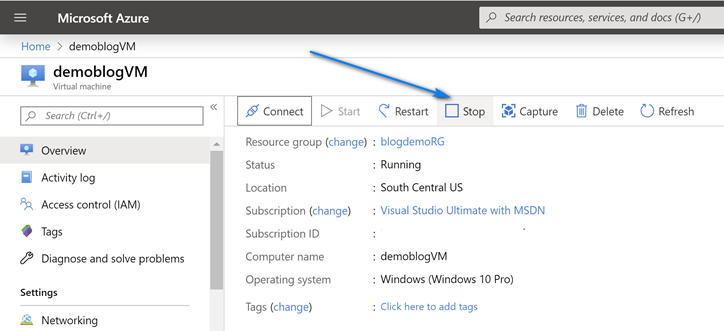
When you are ready to use the Azure VM again, login to the Azure Portal and select the VM and click “Start”. Then you can reconnect.

I hope you enjoyed this blog and I hope you enjoy your Azure VM and iPad with a mouse as much as I enjoy using mine!